Archive | DIY RSS feed for this section

DIY: RUBY’S DRESSER

12 Feb

after_1
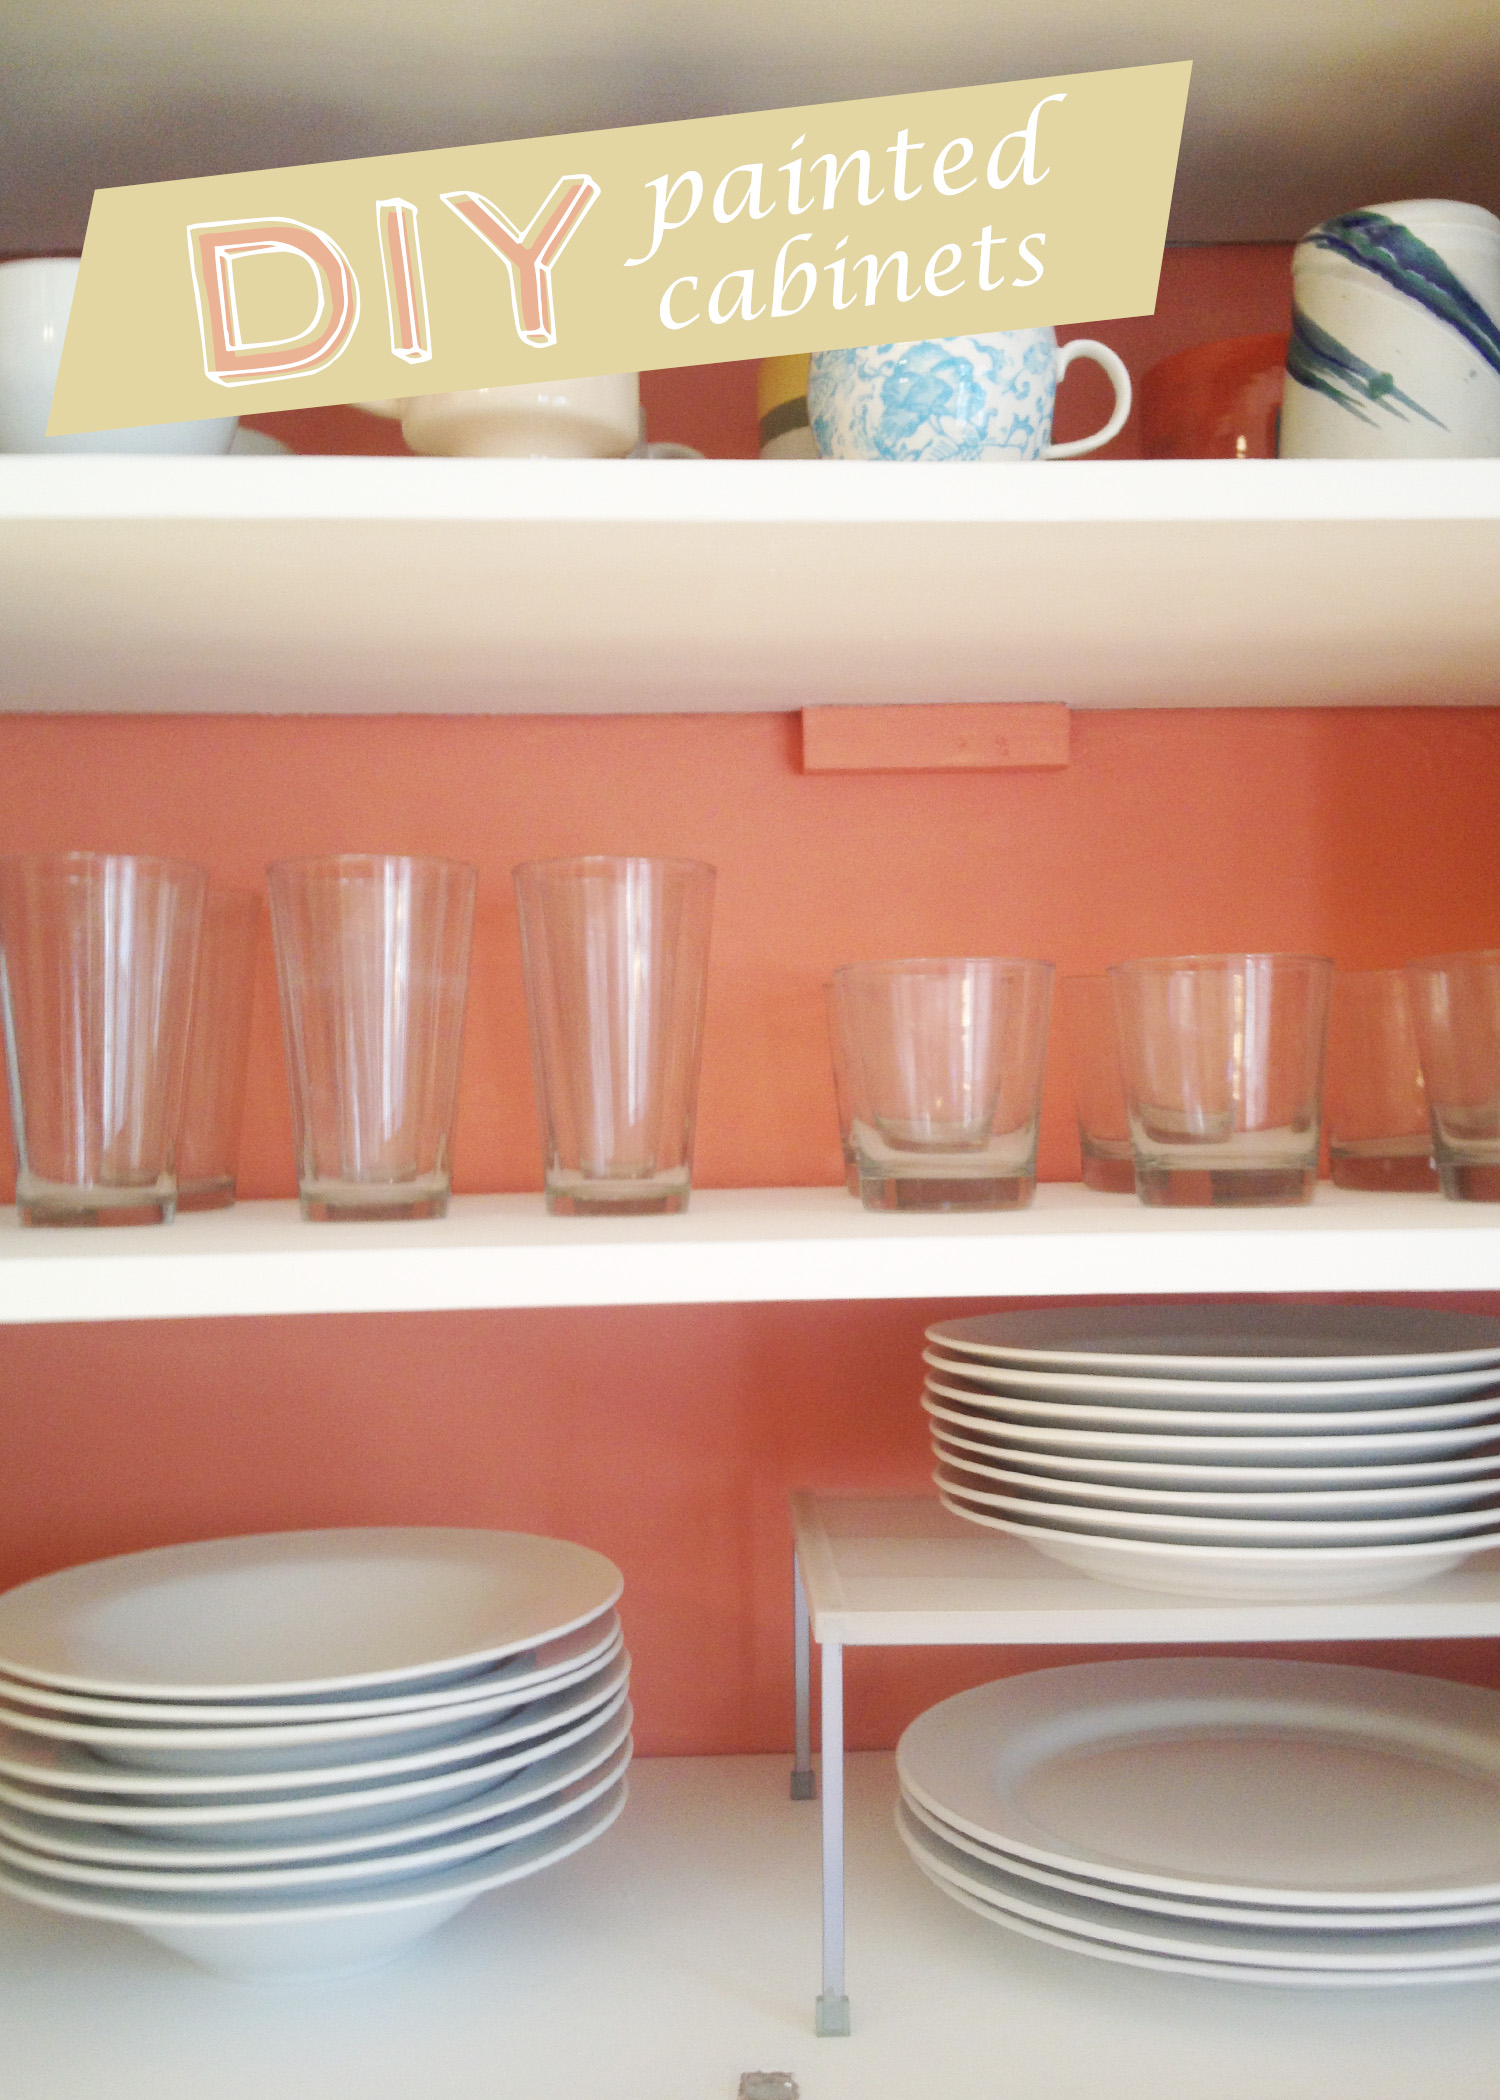
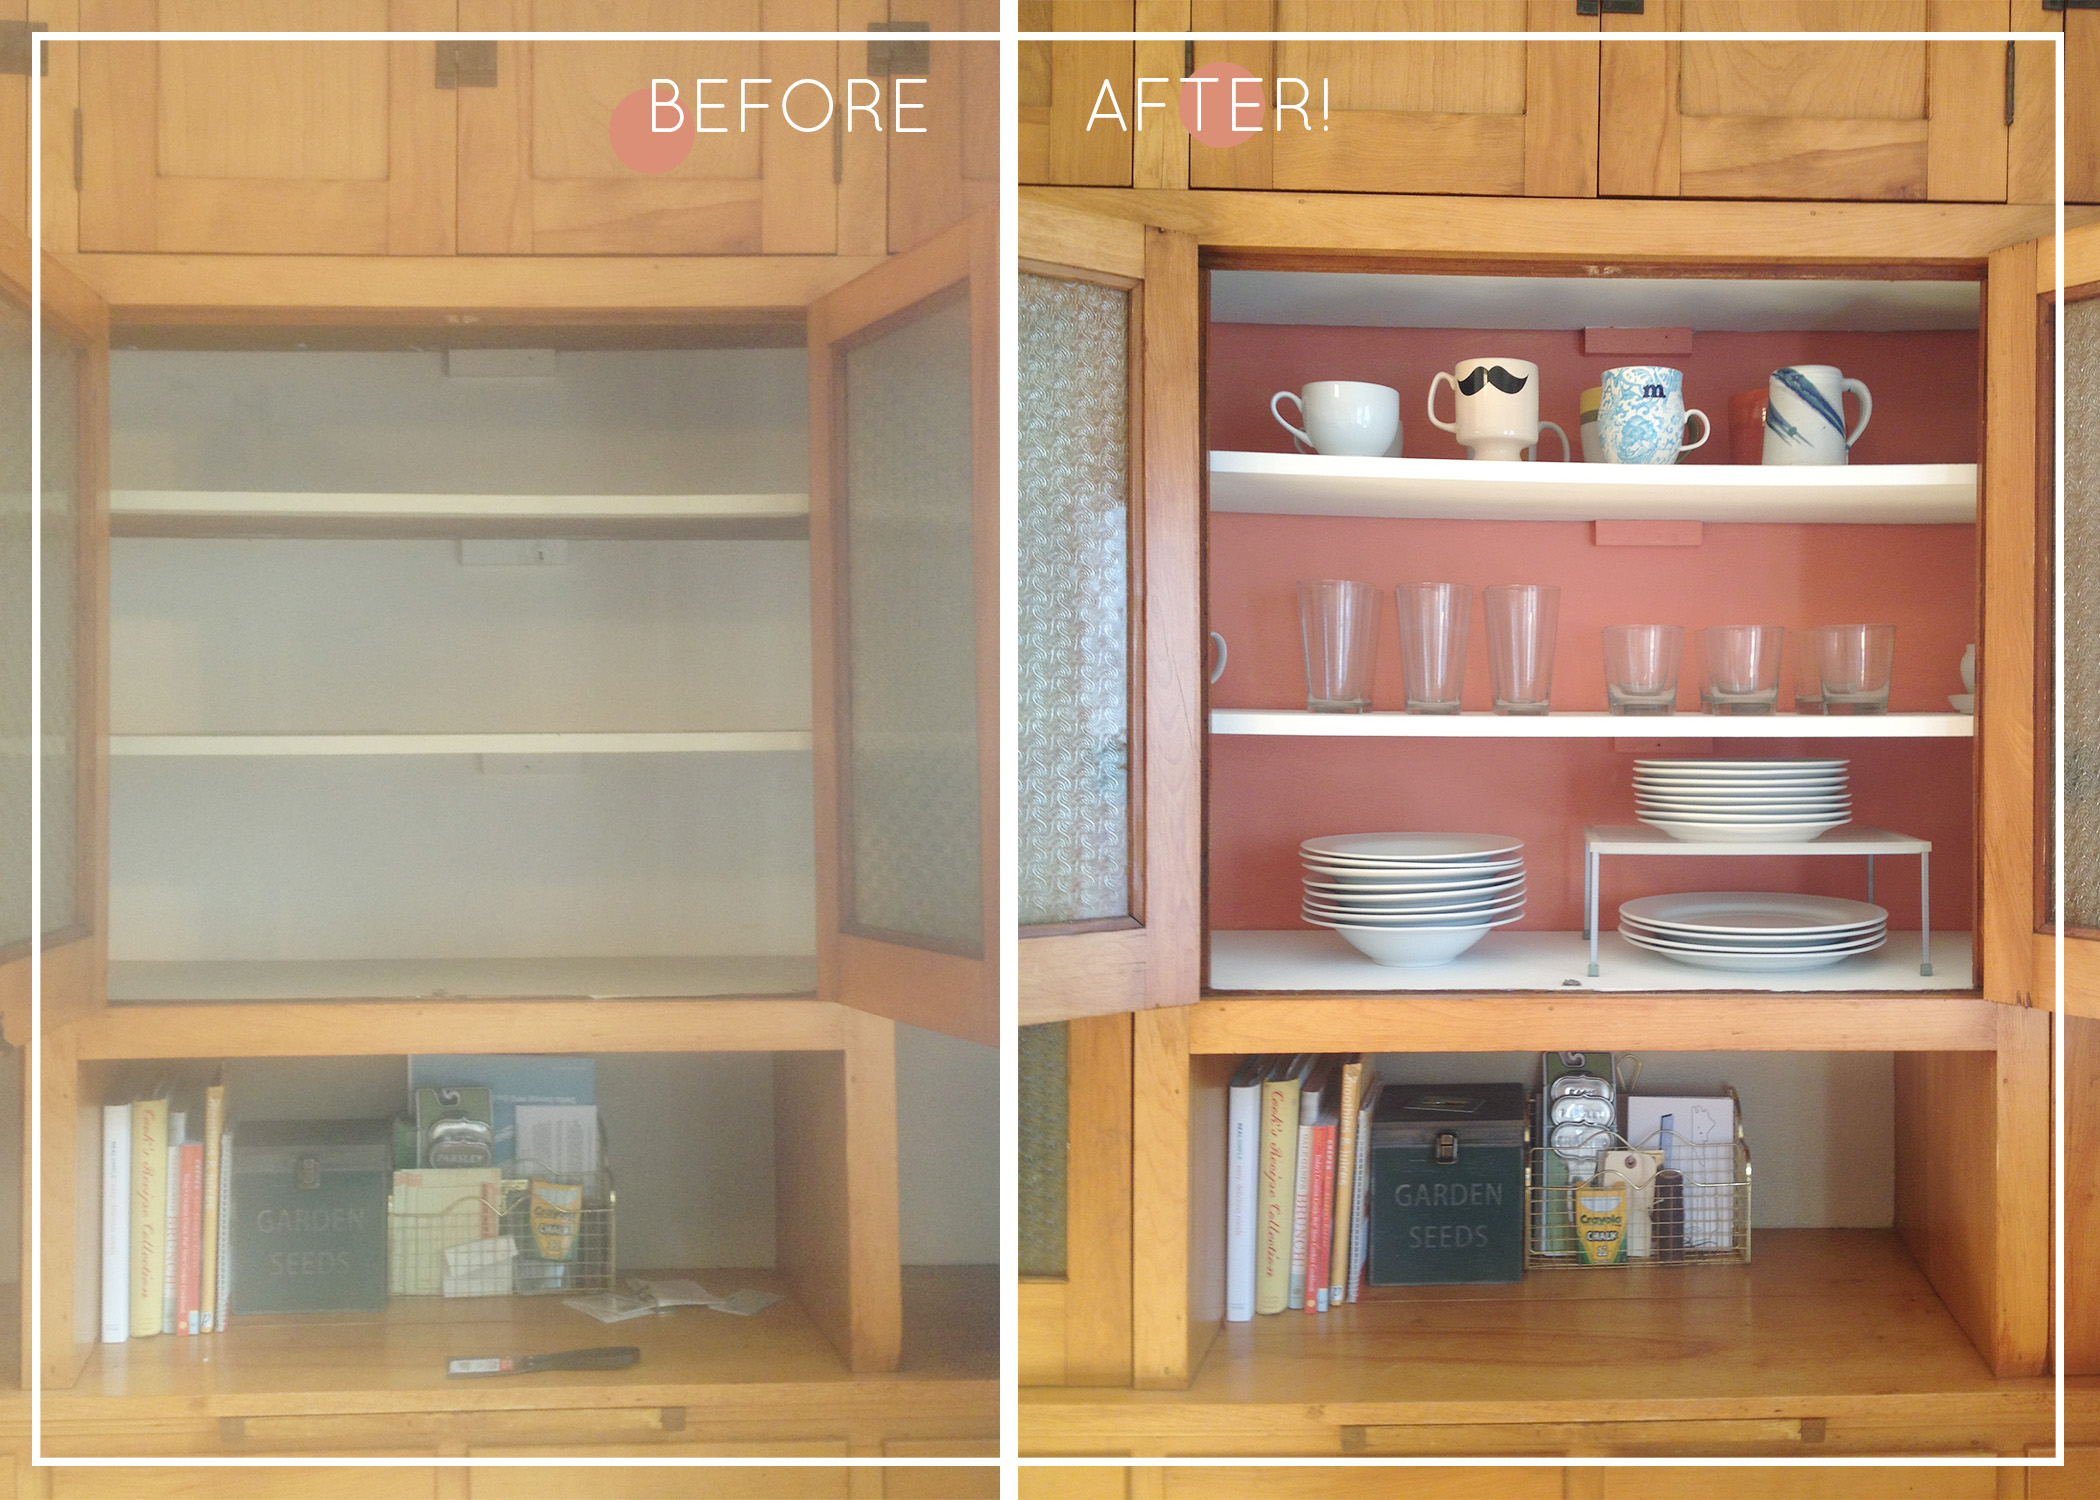
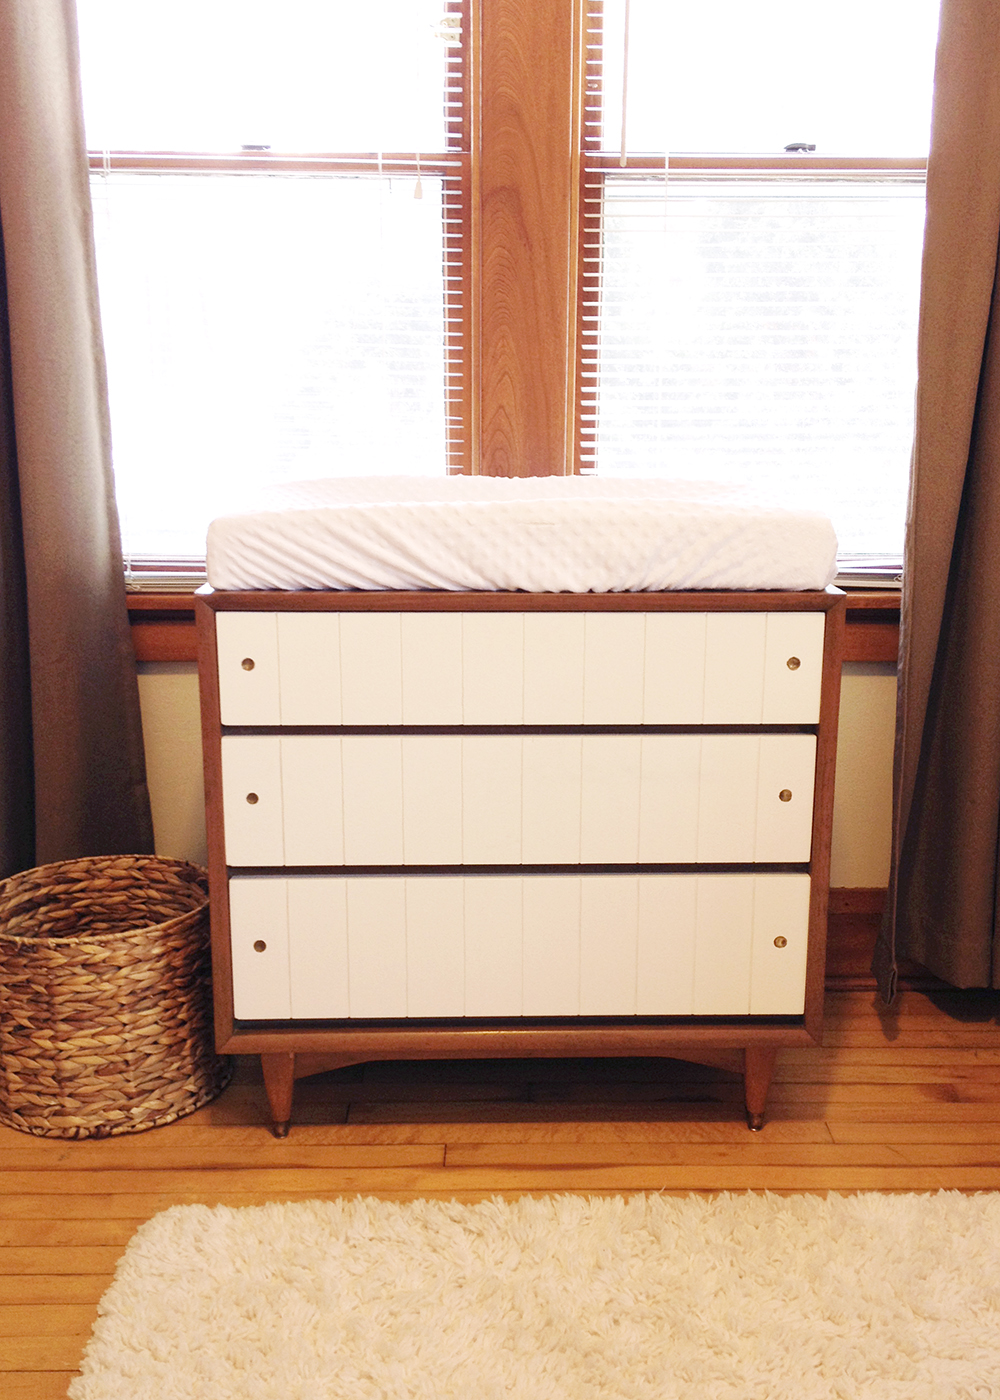
I am so excited to post the DIY to Ruby’s dresser today!  Jonathan and I had searched high and low for the perfect dresser and we just weren’t having any luck.  We really wanted something mid-century to match her crib but nothing was in our price range.  Then we stumbled upon this amazing antique shop in Milwaukee and there it was!  But, it was all wood and we needed something with white so that it complimented the room better.  So we took a risk and painted the drawers.  Below is the before pictures as well as some of the steps we took to get the final product.

before_text
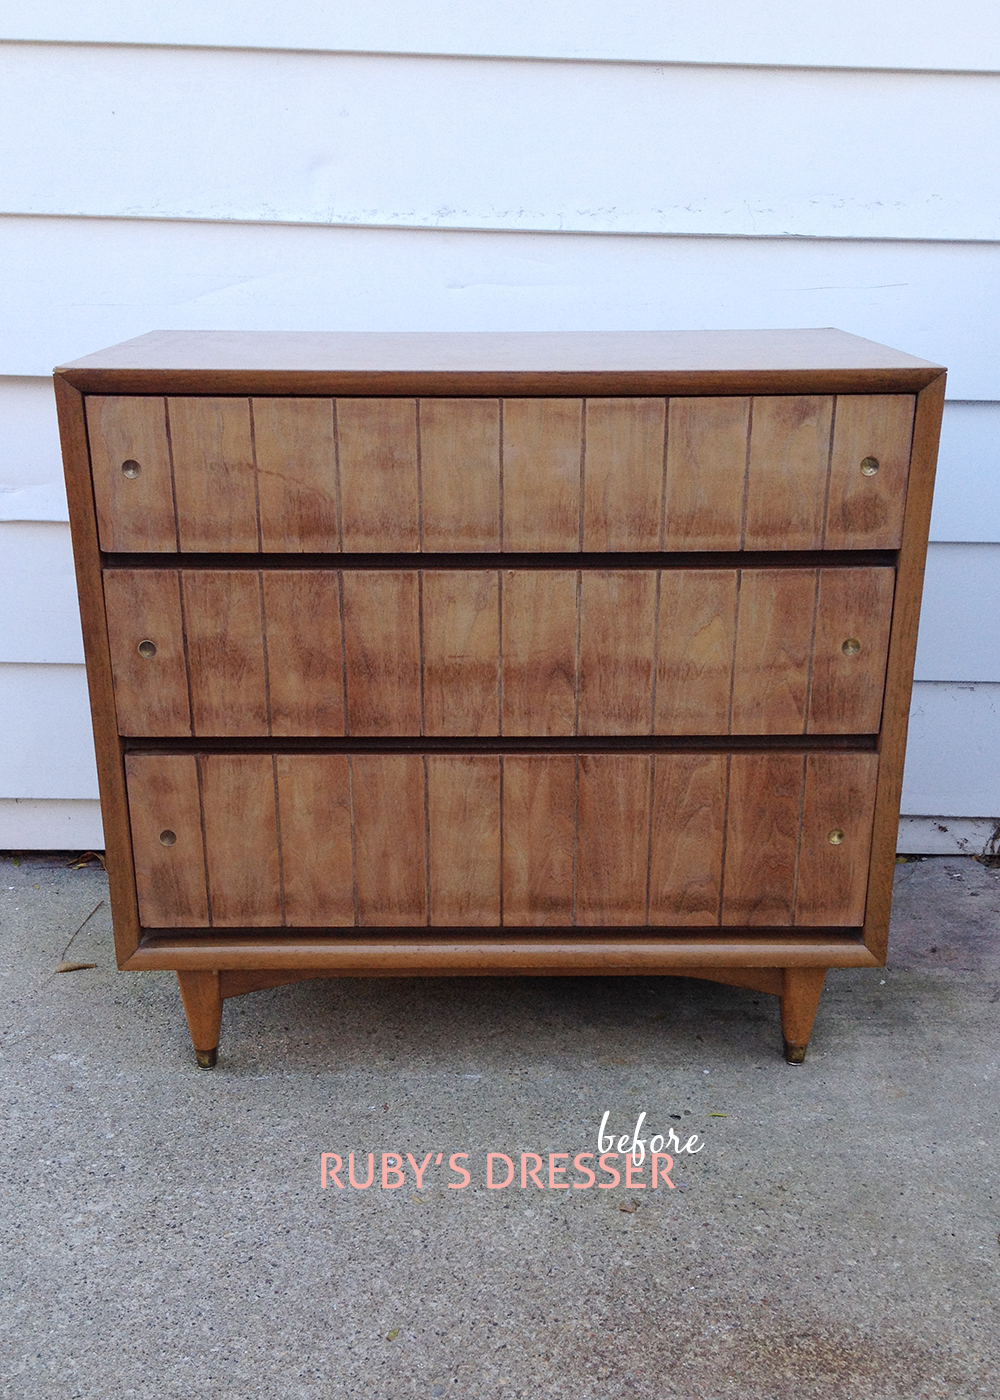
First we sanded the front of the drawers.

sanded

drawers
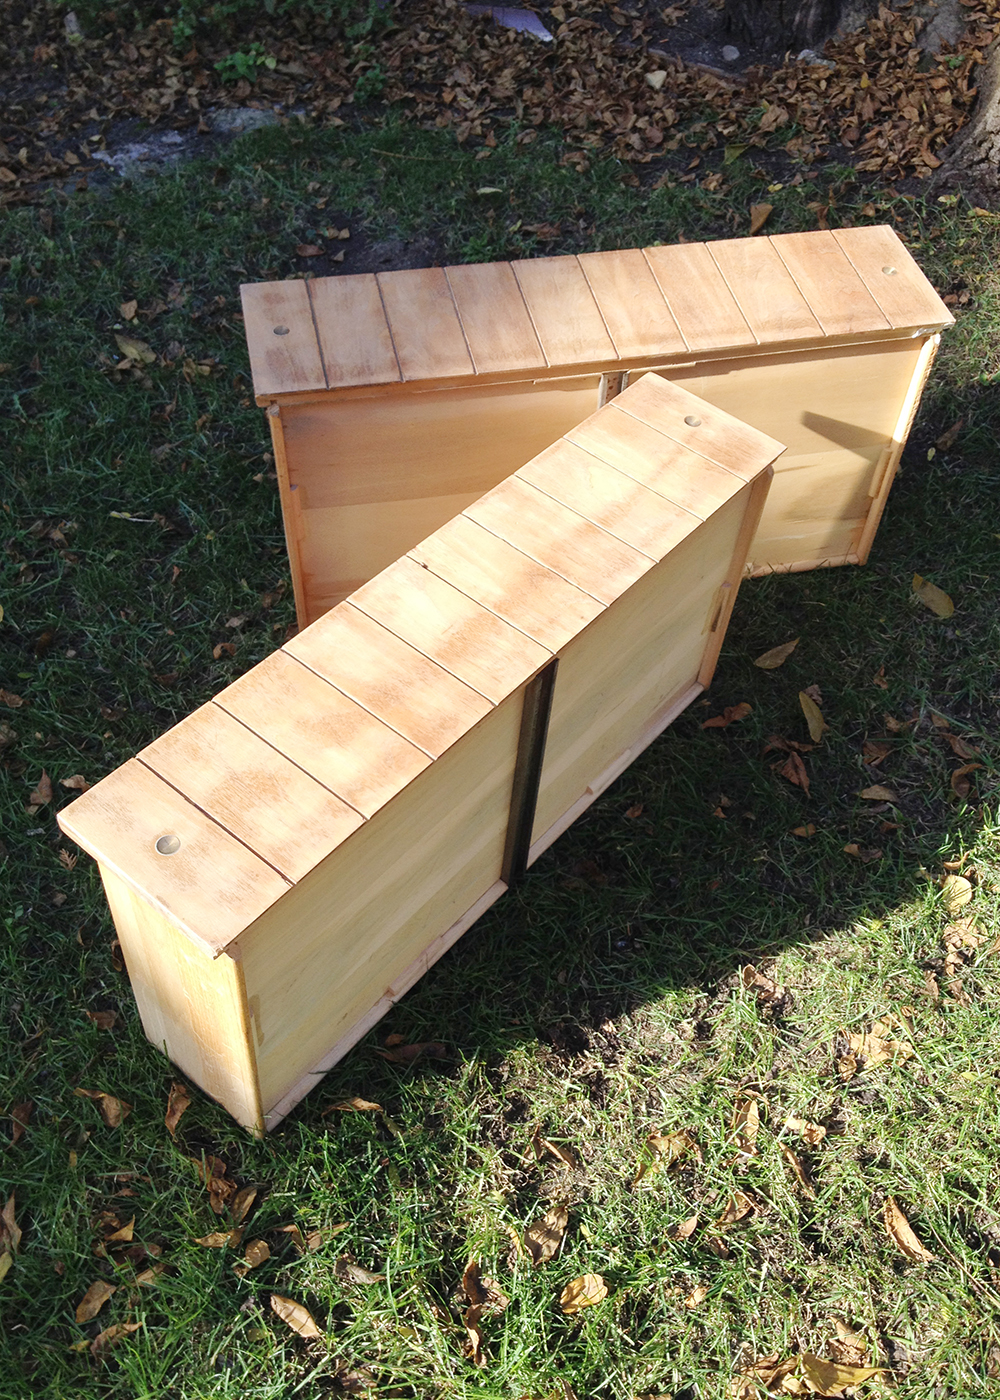
Next we pulled out the drawers to tape and prepare for painting. We had to be extra careful with the taping because of the cute gold indents on the front of the drawers.

paint
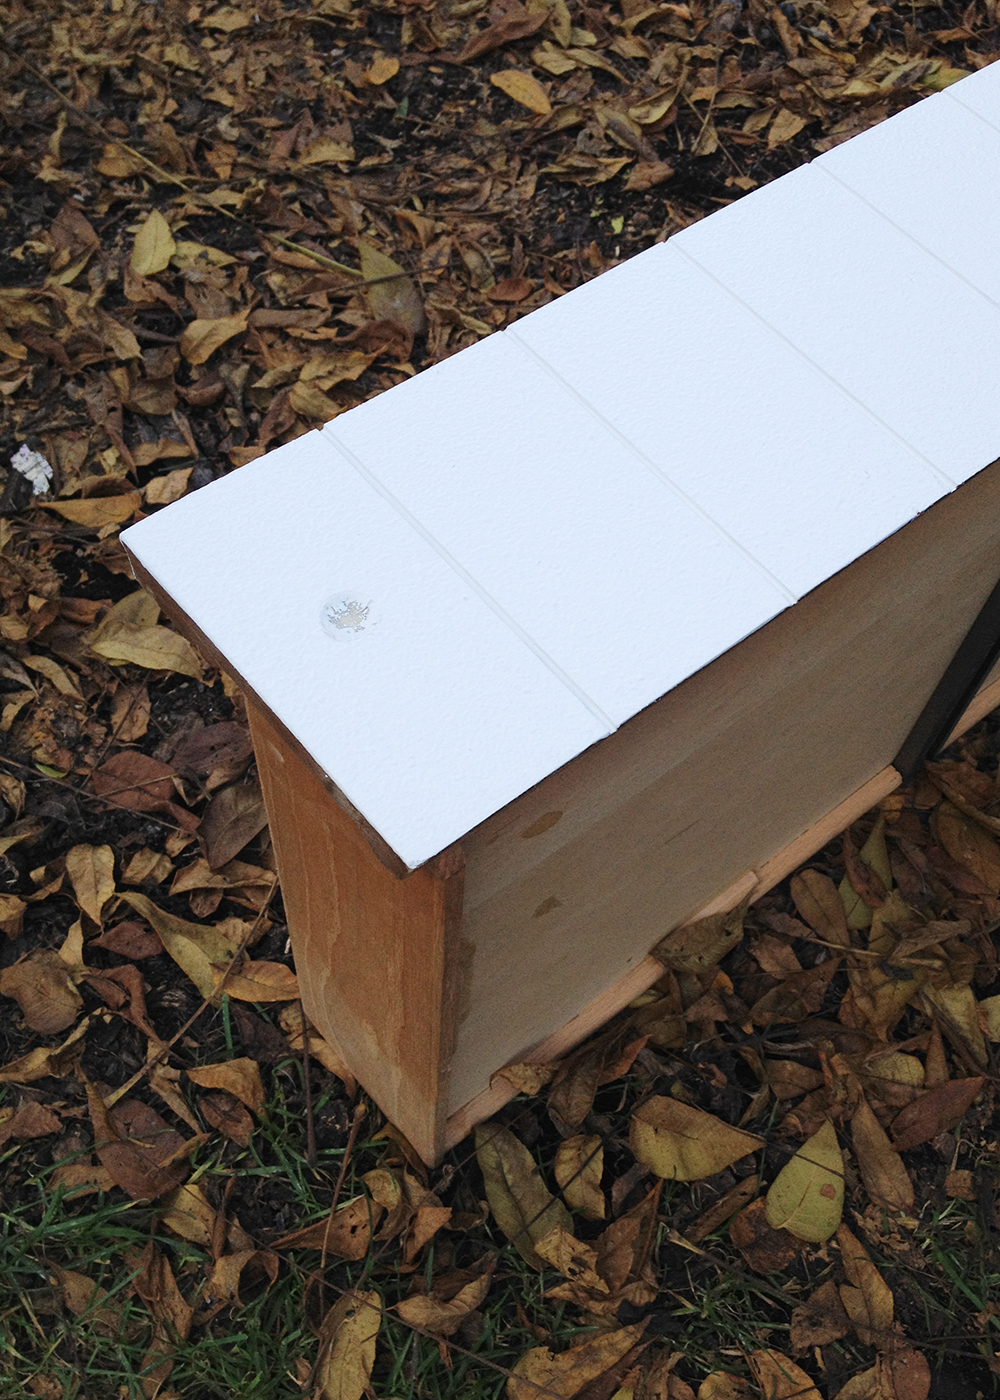
Once the fronts of the drawers were painted, we left them outside to dry.

after 2
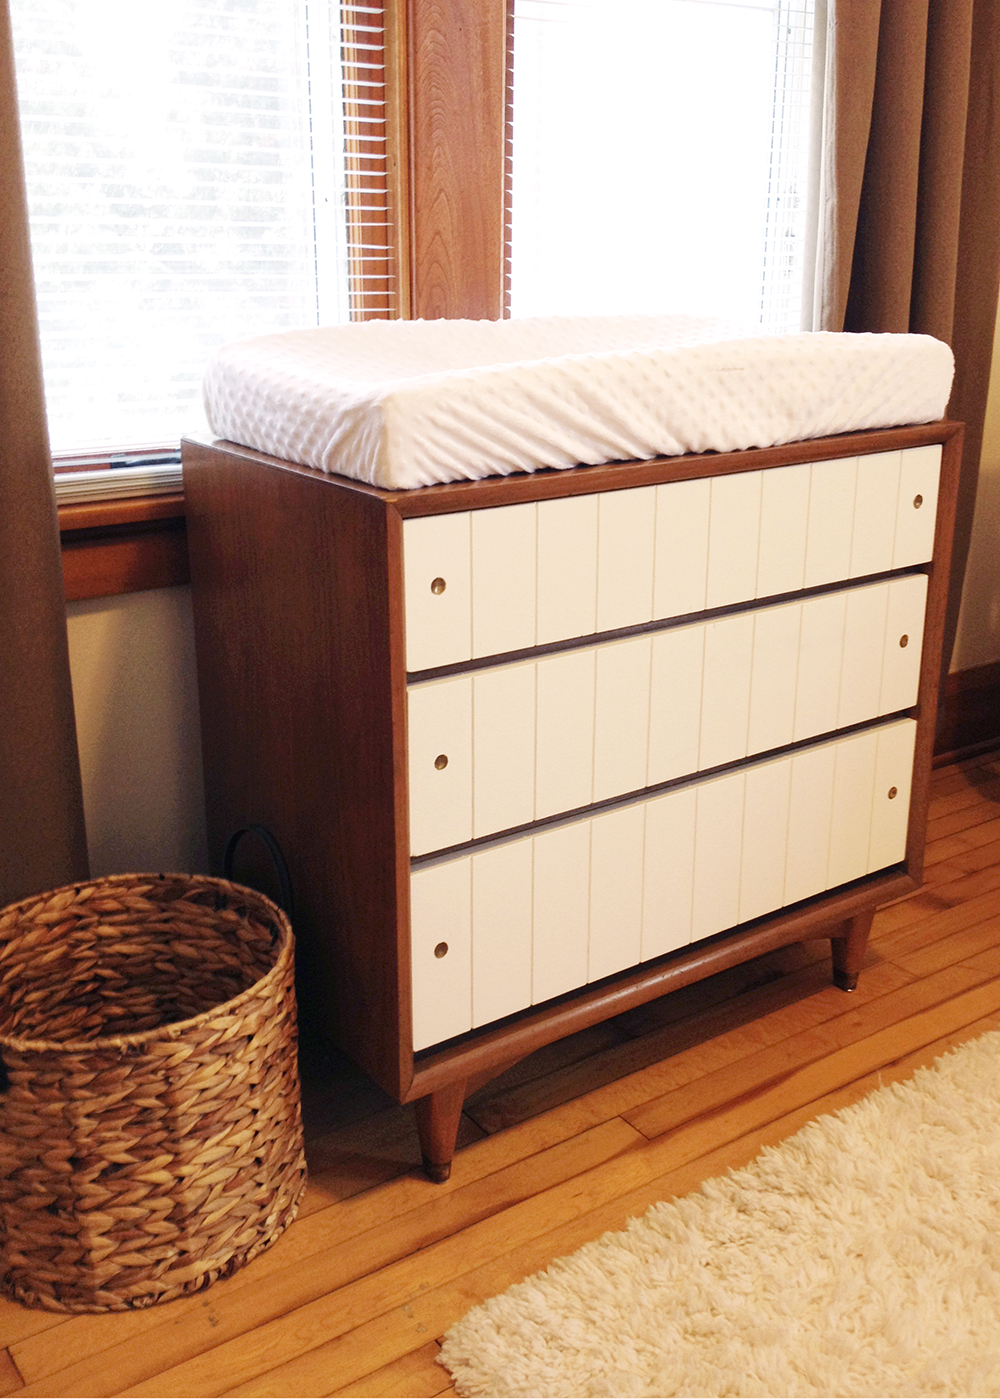
And that’s it!  It was that easy!  I am so happy with the end result!

after_1

Mason Jar Lemonade

14 Aug

mason jar cover

Good morning! I am sorry for my lack of posts the past couple of days, we have been so busy!  But I am making it up to you with a really fun post today!  We went on a fun picnic in the park with our neighbors the other night, and it was our job to bring the drinks.  I thought it would be fun to pre-make lemonade in mason jars since they are so cute and can be sealed shut for easy packing!  Here is what I did!

picture 1

To Make:

– Trader Joes Organic Lemonade

– Slice of Lemon

– Two Mint Leaves

– Mason Jars

– Straws

* We also brought libations to add to the lemonade for if people were interested in having a mixed drink.

picture 3

picture 2


DIY // Painted Cabinets

24 Jul

cover 1

Good morning friends, and happy Wednesday!  Today I wanted to share with you a DIY project Jonathan and I worked on this past weekend.  We have these really nice, vintage cabinets in our kitchen that just needed a little love.  Someone before us had used that sticky paper stuff that is supposed to look like paint but it just wasn’t cutting it.  At first we were just going to rip the paper out and paint it white, then right before we went to the paint store we decided it needed a little extra pop of color so we decided to paint the back wall coral too!  First I want to show you the before and after pictures.  What a difference right?!

before.after

This process ended up taking a little longer than we thought but it was totally worth it!  Here is what we did.

step 1

Step 1: First, we used a scrapper to rip up all the paper paint.  I think it had been their quite awhile because it was pretty hard to get off.  But, so satisfying when you got a big piece!

step 2 and 3

Step 2: We sanded the tops of the wood to help the new paint stick to the wood.  Step 3: Then, we primed the wood shelves (top, bottom, and sides), and let it dry.  Once the primer was dry, we painted all sides of the shelves white.

step 4

Step 4:  Once the white paint was dry, we used a small paint roller and painted on the coral paint on the back and side walls.  After that paint is dry, your done!  Just make sure to leave the cabinet doors open so that they can dry quicker.

finished 1

finished 2

finished 3

Easy Confetti

16 Apr

Good morning friends!  How was your weekend?  Our weekend was pretty crazy.  Jonathan was super sick, and we had a lot of big moving decisions to make.  Moving halfway across the country is crazy!  If any of you have any good moving tips I would love to hear them!

easy confetti

Today I wanted to share with you a really fun and easy party trick.  The other night Jonathan and I threw a fiesta, and to spice up the table I sprinkled confetti everywhere.  It was SO fun!   All I did to make the confetti was pull out our 3-hole punch and dump all of the leftover paper holes onto the table.  There were a lot of fun colors already in the hole punch, but to add a pop of bright colors I also took some scraps of pink/yellow/purple paper and hole punched those too.  Voila!  Easy Confetti!

DIY Polk-a-dot Cards

21 Jan

polkadot cards cover

Hello!  Happy Monday friends!  How was your weekend?  We had a great weekend!  As I said before, Jonathan’s parents were in town, and we had such a great time with them.  I don’t have school today so I am spending the last day of my weekend catching up on all my art projects so that I am ready for the week.  Doesn’t it feel good when you are completely caught up?!

Today I have a fun DIY project for you!  The project is fun hand-painted stationary cards.  For this DIY you will only need 4 materials, and you probably have all of them lying around your house!  I am thinking of starting a DIY column where each project only needs 4 materials or less.  What do you think!?  It is just so nice to be able to save money on art projects, and it is especially nice when you have all the materials at home already!  I thought it would be fun to do this DIY project because there is always so many thank you cards to write after the new year.  Now you can make them yourself!  Here are all the directions for this project.  Enjoy!

polkadot cards directions

1. The materials you will need are a pencil with an eraser on it, a felt-tip pen, paint and white card stock.  I used gold paint because I am obsessed with the color (as you can see in this post), but you can use any color!

2. Now, write your desired message on the card stock with your pen.  Then pour a small glob of paint onto a paint palette (or paper plate) and then dip your pencil eraser into the paint.  I found that if you just lightly dip the eraser into the paint it works best.  Also, dip the eraser in the thickest part of the paint glob for the best results.

3. Next, dot the end of the painted covered eraser onto the paper.  Re-apply paint after every dot.  It is also best if you gently dot the paper.

4.  I decided to also dot extra pieces of card stock, leaving a space in the middle to include a message later.  I did this because it is always nice to have stationary on hand, and you can write in the appropriate message depending on the occasion later.

5.  Let the paint dry, and then you are done!  Viola!

DIY Preview

9 Jan

Dots preview_final

Hi friends!  I am working on a fun DIY post for you!  It isn’t quite ready yet, but I thought I would post a preview picture so that you have something to look forward to!  I am excited about this upcoming post, and I think you will like it to!

Right now I am trying to get back into the swing of things with school, but once I get settled in, I have some fun projects to share with you.  I have had the opportunity to work with some wonderful clients to create a few products I am really excited about!  So, stay tuned, and I will show you soon!  Until then, I hope you enjoy this wonderful Wednesday!

Gift Wrapping with Kraft Paper Two Ways

14 Dec

Happy Friday!  I am so happy it is almost the weekend!  It has been a busy week so I am excited to do a little relaxing and go on a date with my fabulous husband!

Wrapping cover

Today I have a basic DIY for you!  I thought I would share with you my favorite gift wrapping tricks.  First and foremost, my favorite way to wrap gifts is with brown kraft paper.  It is a must craft item I keep in my house at all times.  I love it because you can make all your gifts look different depending on how you want to accent the kraft paper.  Below I have showed you two ways I love to wrap my gifts with kraft paper.  There are millions of other great ways to wrap presents, but these are just a couple of fun examples!

wrapping display 1

Vintage Tags:  All you will need for this is kraft paper, a fun type of twine and vintage tags.  For mine, I used red and white striped twine, and I wrapped it around the gift three times.  Then, I tied a bow with the tag attached to the twine.

Painted Letter:  For this gift you will need kraft paper, paint, a paint brush and a stencil of the letter of your choice.  I securely placed the letter stencil on the top of the wrapped gift, and then painted the inside of the stencil red.  I also accented the red letter with a little bit of gold paint.  Voila!

What is your favorite gift wrapping tips?

DIY Christmas Tree Garland

7 Dec

Display 1

Hello friends!  I have another fun DIY for you today!  Remember the post awhile back where I showed you how to make a fun pom pom garland for a party?  Well, here is another fun use for the pom pom garland – Christmas tree garland!  Use the instructions here to create the garland and then just stream it up around your tree.  I used bright red poms with white thread for my Christmas tree garland.  I was so happy with how it turned out I decided not to even hang ornaments!  Here are a few more pictures of how our tree turned out.  Enjoy!

Display 2

Happy Friday friends!

DIY: Pom Garland

9 Nov

Today I have a really fun DIY for you!  You can make your own pom pom garland in three steps.  And there are only three materials!  Two of the materials you will most likely already have and if so, this project should only cost you about 3 to 4 dollars.  I think this is a great project for decorations when you are throwing a party but it is also fun just for everyday decorations.  I also have plans to make another one for the holidays (when it is time to trim the tree!) so stay tuned for that one as well.  

Materials:
– Sewing needle
– Thread
– 80 to 100 pom poms (I got mine at Michaels)
 
 
Directions:
1. Gather your materials.
2. Next, thread the needle. Then take one pom and thread the needle into the middle of the pom and pull it through onto the thread.  
3. Thread about 80 to 100 poms onto the thread.  I spaced them apart by about 1 0r 2 inches.
 

Pumpkin Carving

23 Oct

Hi friends!  First, I want to say thank you for your kind response to my Christmas Project!  You all were so sweet and we had such a great response!  So thank you!  Also, let me know if you have any questions about custom designs or ordering.  All the designs can be customized to your preferred wording and colors.  Can’t wait to see the designs you choose.  Anyone have a favorite?

Ok, on to other things.  Today I want to show you the pumpkin Jonathan and I carved.

We chose Harry Potter because, well, we both LOVE Harry Potter and it seemed so festive!

After we carved our HP pumpkin we watched the final Harry Potter movie and roasted pumpkin seeds.  It was magical.

One other thing I wanted to highlight, was that we used the silhouette effect where the candle light shows through the negative space instead of through the letters.  I had never done this technique before but I really liked it.  The Ruche blog has some great printable stencils for carving pumpkins that I think would be really cute for carving your pumpkins this way that you can find here.

Happy pumpkin carving friends!